
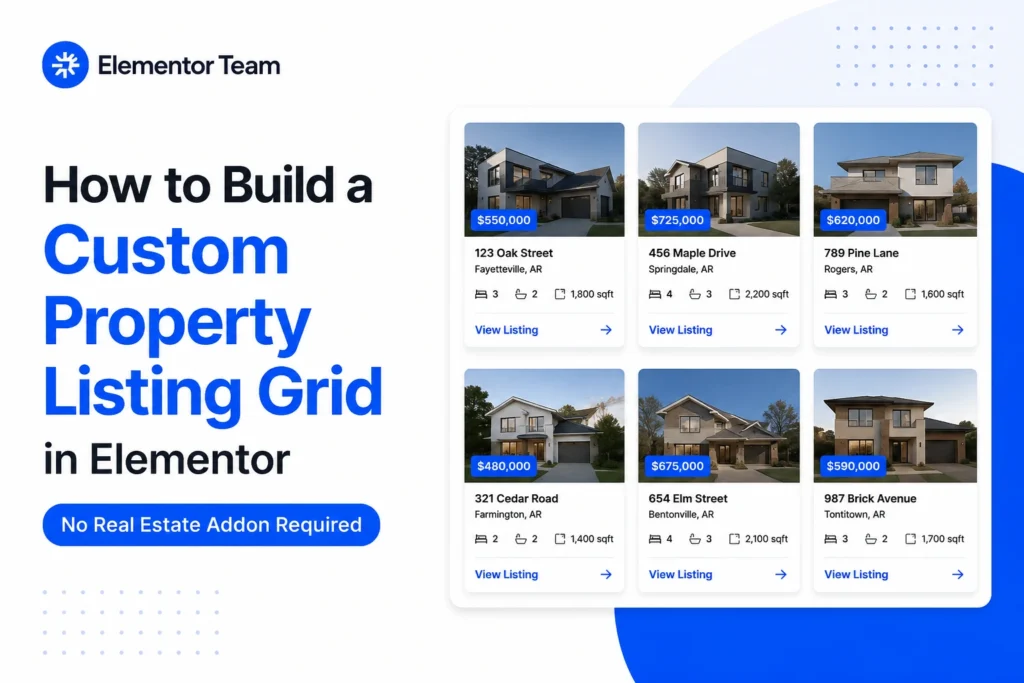
Most “Elementor real estate” tutorials point you toward a dedicated real estate addon — another plugin, another subscription, another thing that can break on the next WordPress core update. But if you’re comfortable with Elementor Pro’s native Loop Grid and Nested Elements, you can build a fully custom, filterable property listing grid using tools you likely already have installed.
This guide walks through building an Elementor property listing grid — image, price, beds/baths, location, and a “View Listing” button — using only core Elementor Pro, a Custom Post Type for listings, and (optionally) Advanced Custom Fields for property details. By the end, you’ll have a repeatable system you can reuse across any real estate site you build.
Why Skip the Dedicated Real Estate Addon?
Real estate addons are convenient, but they come with tradeoffs worth knowing before you commit a client site to one.
Extra plugin overhead. Every addon plugin adds its own CSS and JavaScript to the page. That overhead works against the performance gains Elementor’s atomic CSS engine in Editor V4 was specifically built to deliver. Real estate sites are already image-heavy — piling on another plugin’s stylesheet and script bundle compounds load time issues that hurt both user experience and search rankings.
Less design control. Addon widgets are usually built around preset card layouts with a fixed set of style options. If you want a layout the addon didn’t anticipate — a different badge placement, a custom hover state, an unusual grid rhythm — you’re often stuck, or you end up fighting the addon’s CSS with overrides of your own.
Update risk. Niche real estate addons are frequently maintained by small teams. When Elementor ships a major update — like the Editor V4 atomic CSS shift — smaller addon plugins can lag behind for weeks or months, leaving you with a broken listing grid until a compatibility patch ships.
You may not actually need it. Strip away the marketing, and a “property listing widget” is really just a repeatable card pulling structured data — price, beds, baths, address, status — into a grid. That’s precisely what Elementor’s Loop Grid and Nested Elements were built to do natively, once your data is structured correctly.
To be fair, dedicated real estate plugins still earn their keep in specific situations: MLS/IDX feed integration, automated data syncing from a multiple listing service, or built-in lead-routing CRMs. If you need those, a specialized plugin is still the right call. But for agent and agency sites managing their own listings directly in WordPress, the native Elementor approach is often not just sufficient — it’s better for performance and design flexibility.
What You’ll Need
Before you open the Elementor editor, gather these pieces:
- Elementor Pro, which unlocks Theme Builder, Loop Grid, and Nested Elements — none of these are available in the free version.
- A Custom Post Type for “Properties.” Many hosting setups and lightweight plugins (Custom Post Type UI is a common, free choice) can create this in a few clicks without touching code.
- Custom fields for property details — price, bedrooms, bathrooms, square footage, and address. Advanced Custom Fields (ACF) is the most widely used option, but any custom fields plugin that Elementor’s Dynamic Tags can read will work.
- A taxonomy for property type and/or location, if you plan to add filtering later (e.g., “Condo,” “Single Family,” or neighborhood names).
Getting this checklist sorted before you touch the Elementor editor will save you from rebuilding your card template halfway through.
Step 1: Set Up the Property Custom Post Type and Fields
Data structure comes first — Elementor can only display what’s actually stored in a well-organized format.
- Create a “Properties” custom post type. Give it a clear singular/plural label (“Property” / “Properties”) so it’s easy to identify later in Elementor’s dynamic tag menus.
- Add custom fields for the details you want to display. At minimum: price, bedrooms, bathrooms, square footage, and full address. Consider adding a listing status field (For Sale, Pending, Sold) so you can visually flag availability on the card itself.
- Add a featured image field — or simply use WordPress’s native Featured Image — for the primary property photo that will anchor each card.
- Set up a taxonomy for property type (House, Condo, Townhome) and/or neighborhood/location, since this becomes the backbone of your filtering system in Step 4.
- Enter a handful of test listings with real data before building the template, so you can see exactly how the card renders instead of guessing from empty fields.
Getting this structure right first is the single biggest time-saver in this whole process — most rebuild headaches come from realizing halfway through the design phase that a field is missing or misnamed.
Step 2: Build the Loop Item Template (the Property Card)
This is the single card design that repeats for every property in your grid, so it’s worth spending real design time here.
- In Elementor, go to Theme Builder → Loop Item, and create a new Loop Item template tied to your Properties post type.
- Use Nested Elements — a Container that holds other elements — to structure the card. A typical layout: property image at the top, price and status displayed as an overlay badge on the image, then a row showing beds, baths, and square footage, followed by the address, and finally a “View Listing” button at the bottom.
- For each dynamic value, click the element and use the Dynamic Tags icon to map it to the corresponding custom field: featured image maps to the property photo, text elements map to price, bedrooms, bathrooms, and address.
- Style the card once, here, in the Loop Item template — spacing, typography, corner radius, hover effects — and every card that renders from it across your entire site will inherit those styles automatically.
- Add a hover state to the card (a subtle shadow lift or image zoom) to make the grid feel interactive rather than static — a small touch that noticeably improves perceived polish on real estate sites, where buyers browse dozens of cards in a session.
- Preview the card with your test listings from Step 1 to confirm every dynamic field is pulling correctly before moving on.
Step 3: Add the Elementor Property Listing Grid to Your Listings Page
With the card template built, it’s time to display it as a full grid.
- On your listings or search results page, drag in the Loop Grid widget.
- In its settings, select the Loop Item template you built in Step 2.
- Set the Query source to pull from the Properties post type.
- Adjust the number of columns and rows to control how many listings display per page — three columns is a common default for desktop, collapsing to one or two on tablet and mobile via Elementor’s responsive controls.
- Enable pagination if your listing volume is large enough to need it, so the page doesn’t load every property at once.
- Set a sensible default sort order — newest listings first, or lowest-to-highest price — under the Loop Grid’s query settings, so visitors see a logical order before applying any filters.
At this point, you already have a fully functioning, dynamically populated property grid with zero dedicated real estate plugins installed.
Step 4: Add Filtering (Optional but High-Value)
Filtering is what turns a static grid into a genuinely useful search tool, and it’s usually the feature clients ask for first.
- If you want visitors to filter by property type or location, add Elementor Pro’s Taxonomy Filter widget alongside the Loop Grid, and map it to the taxonomy you set up in Step 1.
- Make sure the Taxonomy Filter widget and the Loop Grid widget share the same query ID in their Advanced settings — this is the connection that tells Elementor which grid the filter should actually control.
- For numeric filtering like price range or minimum bedroom count, native Elementor filtering is taxonomy-based rather than range-based out of the box. Site owners commonly handle this either by creating price-range taxonomy terms (e.g., “$200k–$400k,” “$400k–$600k”) as a practical workaround, or by adding a lightweight query-filter plugin specifically for the numeric range functionality while keeping the rest of the build addon-free.
- Test every filter combination — property type plus location, property type plus price range — to confirm the grid updates correctly rather than showing stale or empty results.
Performance and SEO Considerations for Real Estate Grids
The grid is one piece of search visibility. Google Business Profile, neighborhood pages, and reviews do the rest, and we cover all of it in our guide to local SEO for real estate. Here is what matters for the grid itself.
Property listing pages are some of the heaviest pages on any real estate site, so a few extra steps pay off:
- Compress and lazy-load images. Real estate photography is high-resolution by nature; without compression and lazy loading, a 12-listing grid can easily push a page well past acceptable load times.
- Use descriptive alt text on property images, ideally pulled dynamically from the address or a short description field, which also helps with image search visibility.
- Add schema markup for real estate listings where possible, since structured data can help listings appear with rich snippets (price, image, availability) in search results.
- Keep the Loop Item template lightweight. Every additional nested container and widget in the card template gets multiplied by every listing on the page — a bloated card design is one of the fastest ways to slow down an otherwise well-built grid.
Common Pitfalls
| Problem | Cause | Fix |
|---|---|---|
| Cards display inconsistent spacing | Loop Item not using Nested Elements/Containers consistently | Rebuild the card structure fully in Containers before styling |
| Dynamic fields show blank | Field name mismatch between custom fields plugin and Elementor’s Dynamic Tag mapping | Double-check the exact field key, not just the field label |
| Grid loads slowly with many listings | Too many high-resolution images loading at once | Enable lazy loading and compress property photos before upload |
| Filter doesn’t affect grid results | Taxonomy Filter widget not linked to the same Loop Grid instance | Confirm both widgets share the same query ID in their advanced settings |
| Price/status badge overlaps awkwardly on smaller images | Fixed positioning not adjusted for responsive breakpoints | Test and adjust badge position separately for tablet and mobile views |
| Pagination shows on pages with very few listings | Pagination enabled regardless of total listing count | Set a “show pagination only if results exceed X” threshold, or hide it manually on low-inventory sites |
Frequently Asked Questions
Does this approach work with Elementor’s free version? No. Loop Grid, Nested Elements, and Theme Builder are all Elementor Pro features. The free version doesn’t include the dynamic templating tools this build relies on.
Can I still use this if I later add a dedicated real estate plugin? Yes, in most cases. Since the grid is built on a standard Custom Post Type and custom fields rather than proprietary addon data, migrating to a dedicated plugin later (if your listing volume or MLS integration needs grow) is generally more straightforward than untangling addon-specific markup.
How many listings can a Loop Grid realistically handle? There’s no hard limit built into Elementor itself, but performance depends on your hosting, image optimization, and whether pagination is enabled. For sites with more than a few hundred active listings, pagination (or a “load more” button) isn’t optional — it’s necessary for acceptable load times.
Do I need coding knowledge to set this up? No. Every step described here uses Elementor’s visual editor and standard WordPress admin screens. The only technical step is creating the custom post type and fields, which tools like Custom Post Type UI and ACF handle through a form-based interface rather than code.
A Realistic Build Timeline
For anyone estimating how long this takes on an actual project, here’s a rough breakdown for a single agent site with a moderate number of listings:
- Custom Post Type and field setup: 30–60 minutes, assuming you already know which fields you need.
- Loop Item (card) template design: 1–2 hours, including styling passes and responsive adjustments.
- Loop Grid page assembly: 20–30 minutes once the card template is finished.
- Filtering setup: 30–60 minutes, more if you’re implementing a price-range workaround.
- QA across devices and listing states (sold, pending, empty results): 30–45 minutes.
All told, a first-time build typically takes half a day; repeat builds across multiple agent or agency sites go much faster once you’ve saved the Loop Item template and Loop Grid setup as a reusable site template.
The Bottom Line
A polished, filterable Elementor property listing grid doesn’t require a specialized real estate plugin. With a properly structured Custom Post Type, a handful of custom fields, and Elementor Pro’s Loop Grid and Nested Elements, you get full design control, better site performance, and one less plugin dependency to maintain — while still leaving the door open to add a dedicated MLS/IDX plugin later if your listing volume or integration needs eventually outgrow the native approach.
For further reading, see Elementor’s official Loop Grid documentation and Elementor’s Theme Builder guide to go deeper on dynamic templating, or the Advanced Custom Fields documentation for structuring more complex property data.
Really useful guide for creating property listings with Elementor. The focus on responsive layouts and flexible grids is especially helpful.